|
|
Post by allcans on Oct 3, 2011 13:44:17 GMT -5
We want the best can photos we can get, in the can museum. Cans are not easy to photograph. They are different sizes and the part of the cans we are taking photos of are rounded. This makes it difficult to get rid of any glare from your light sources. Allcans and xxxxxCanManxxxxx recommend purchasing a portable photo studio for the best photo results.
Once you have your set-up, take your photos head-on, so as to not get the top of the can. In order to be consistent with the rest of the cans, you will need to crop the can from the background. When the cropping is done, the top and bottom of the can should look like straight lines and you should not see the top of the can. Make sure you save them in .jpg format. Also, take photos all "sides" of the can. The front of the can should be the unique design, and the other "sides" will be anything else that is different. Typically you should take 2 or 3 photos per can.
When I have more time, I will add some pictures of how I take pictures..
Regards
Allcans
|
|
vnv
Junior Can Collector

Posts: 65
|
Post by vnv on Oct 4, 2011 11:07:06 GMT -5
Some guidelines on how I take my pictures, and some videos of cropping and resizing as well. canpedia.net/FAQ.aspx |
|
|
|
Post by allcans on Oct 16, 2011 11:02:59 GMT -5
As promised, here is the way I take pictures of cans.
1) Use a digital camera to take the pictures, the higher the resolution, the better pictures you will get. I take my pictures with a 10 Megapixel digital camera. If the camera has "scene" setting, use this to take pictures. Make sure the flash is off.
Nowadays you can also use your smartphone. Just make sure not to hold the smartphone in your hand. The best way to put it straight in front of the can, like the camera in the picture.
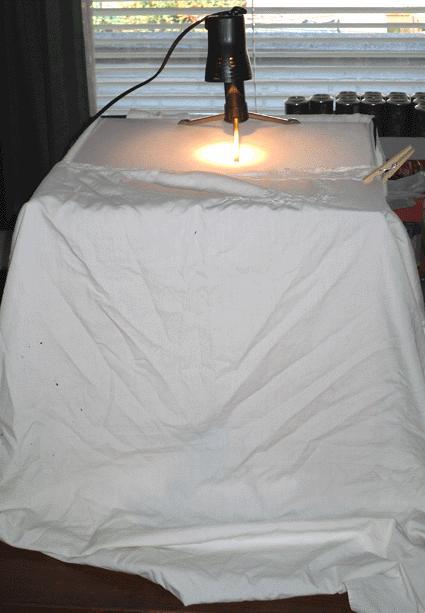
2) Set up your photostudio.
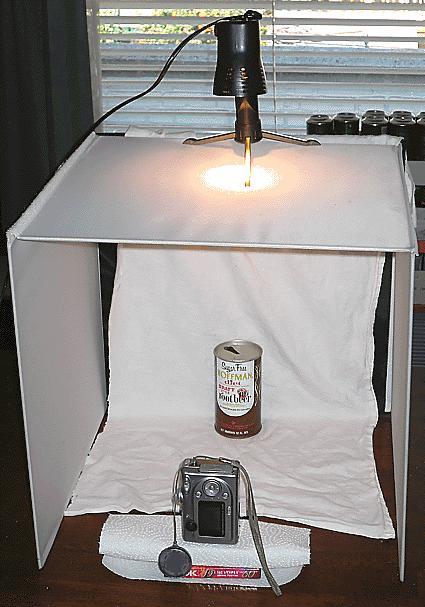
Please notice:
A) preferably use a white background
B) make sure that no light can shine directly on your can
C) The lamp on top is only to be used if there is not enough light in the room. Most of my pictures are taken without it.
D) Use something to elevate the camera, so there is not much room between the picture on the camera and the top and bottom of the screen. As shown in the picture below.
E) Set the timer and cover the front, so no light or reflection come from this side.
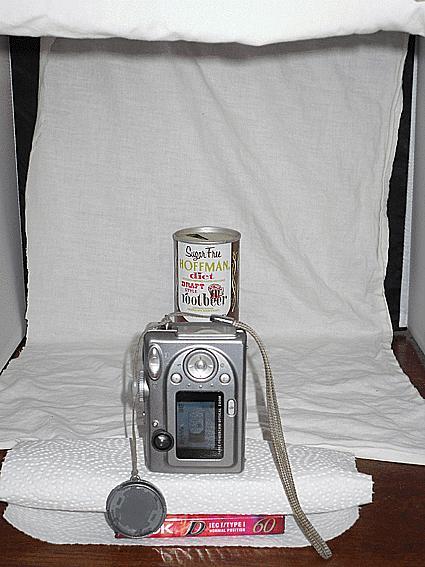
You then get a picture like shown below.

You then only have to edit it, by removing the background.
Any questions, please ask them in this thread.
|
|

